DOCUMENTS
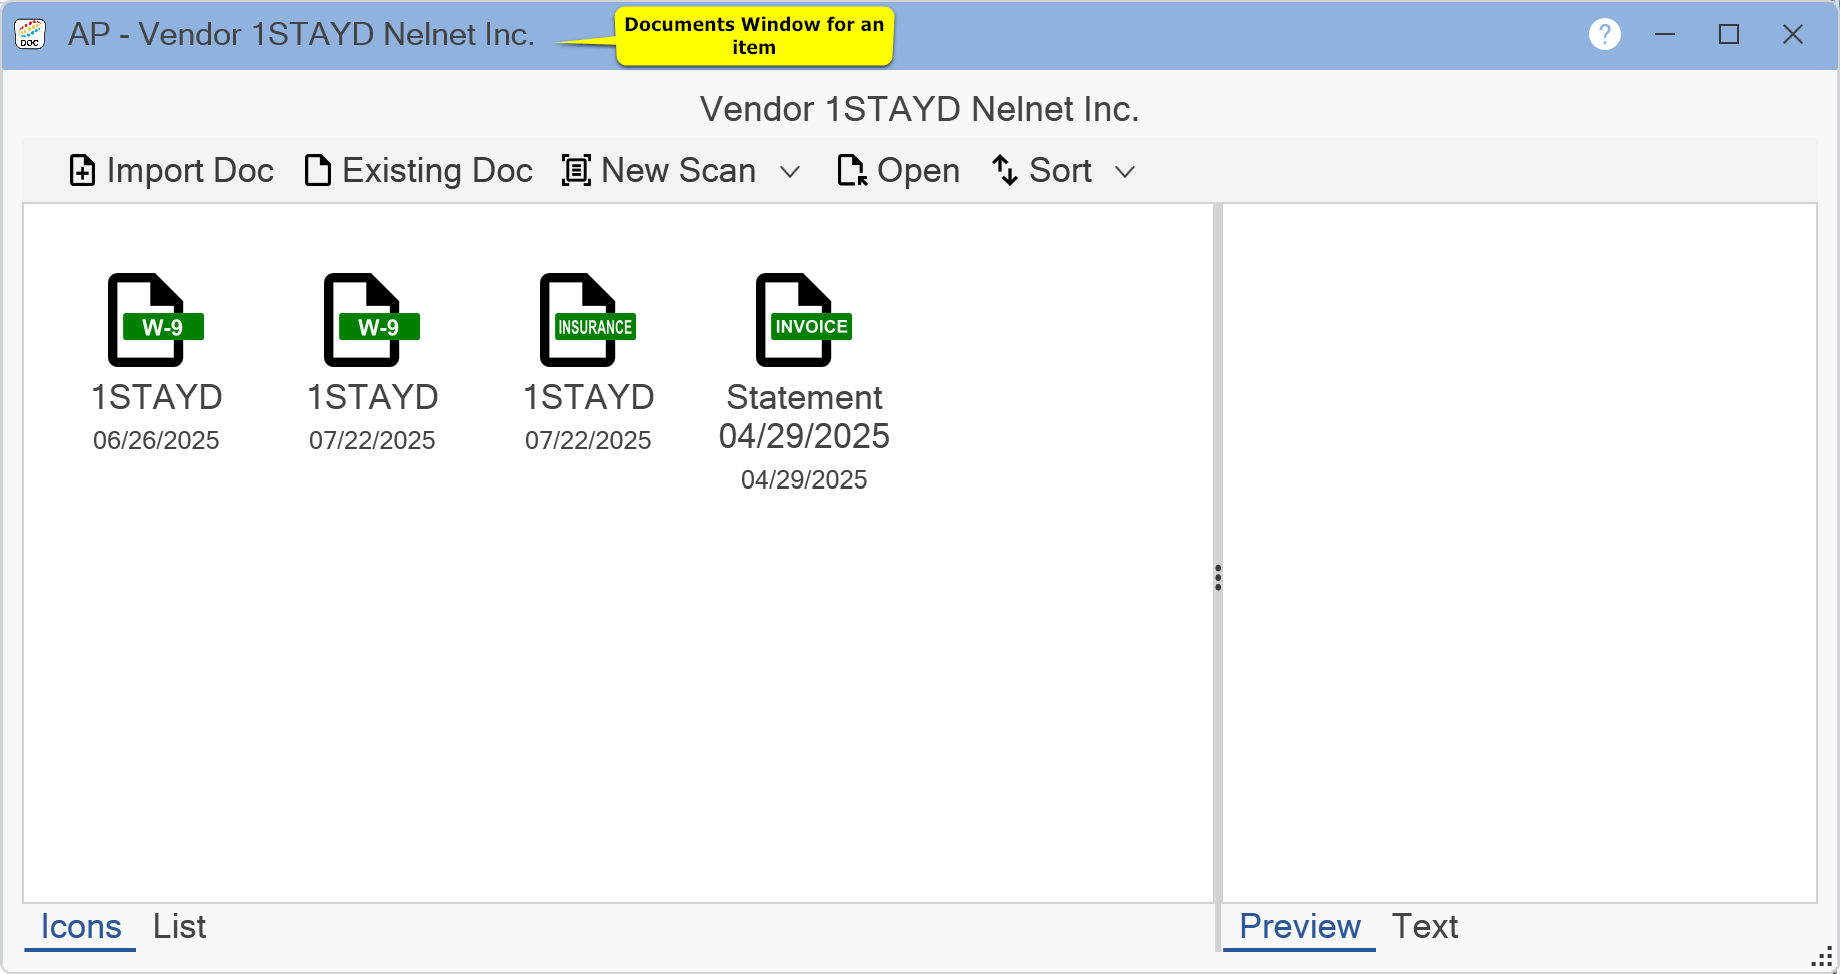
On the title bar is reference information for the record the documents are attached to. You may view documents either as a series of Icons or in a List. When a document is selected, a Preview image or OCR (Optical Character Recognition) Text becomes visible in the right side of the window. Documents directly attached to the record appear first. If there are any documents related to the selected record, these documents appear in the Related Documents section, which will appear after the main documents. Documents in this section are purely for reference. They may not be changed but can be viewed.
To add a new document from your hard drive to the Document Manager, click the Import Doc button.
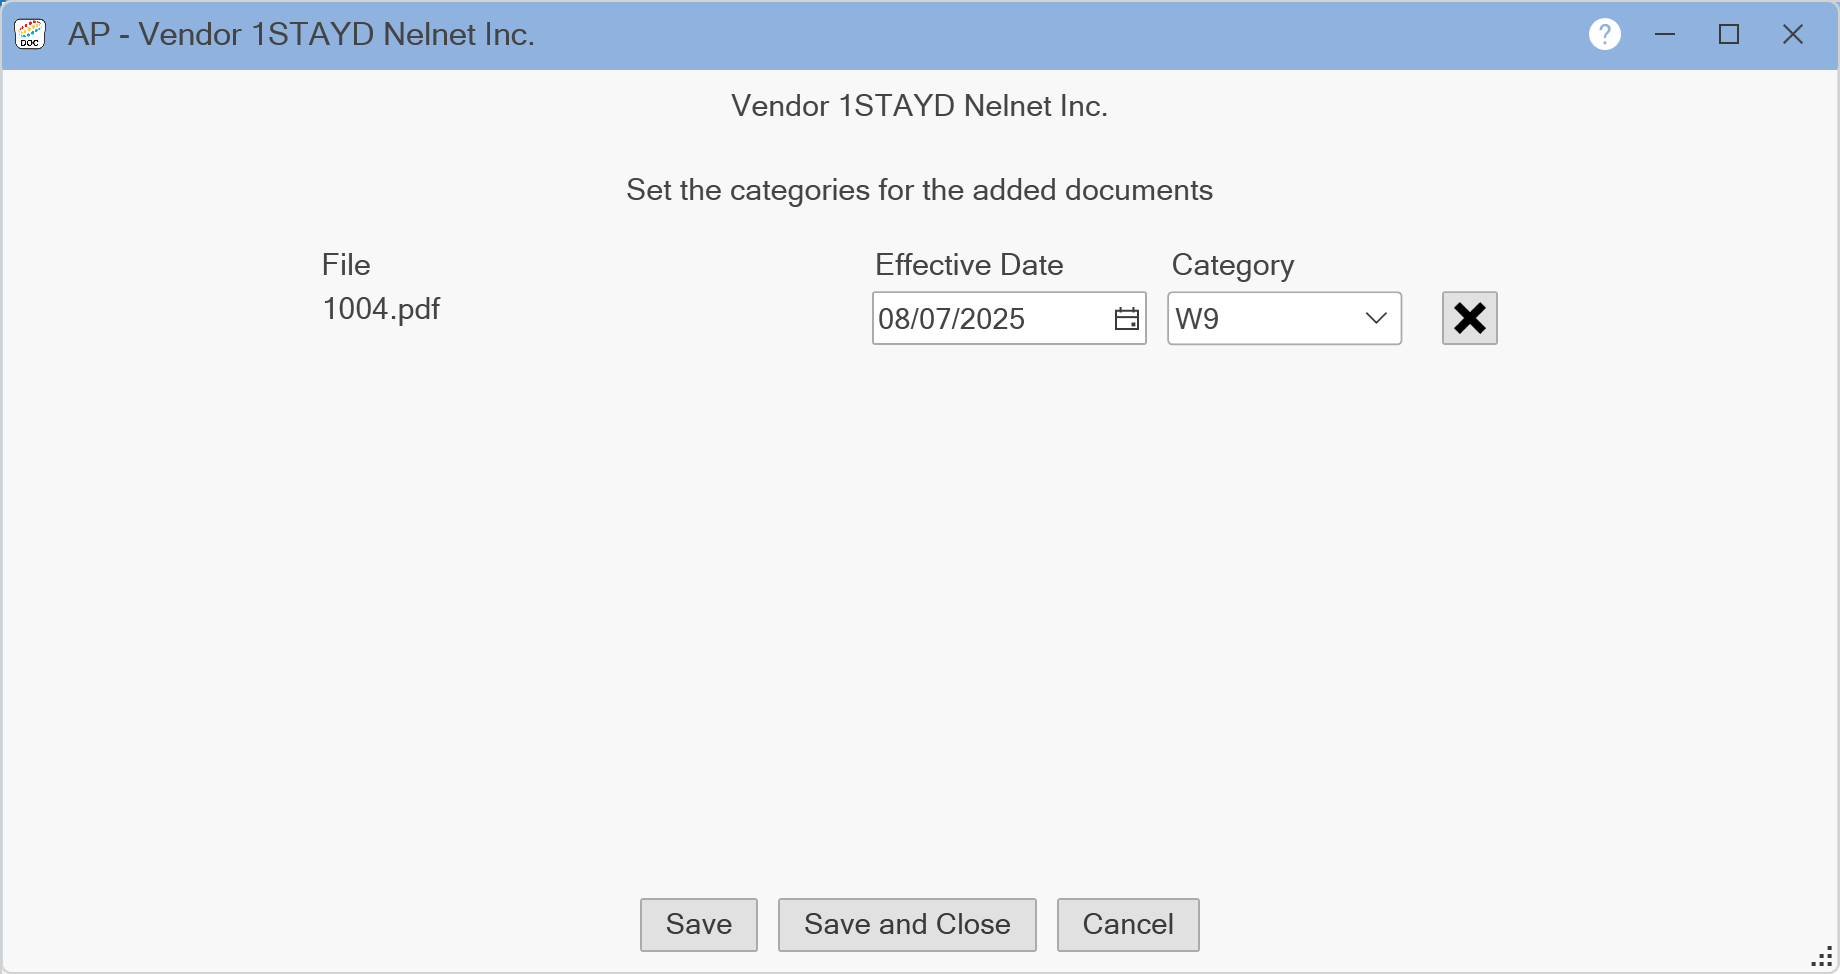
First, select the document you wish to import and click the Open button. You may select multiple documents to import by holding the Control (Ctrl) key on the keyboard as you select the files. Then, a window will appear listing the files you selected to import (as shown above). Set the Effective Date and Category for the files you are importing. If you are attaching documents to a transaction, the Effective Date will default to the effective date of the transaction. Click the X button to remove any documents selected by mistake. When all files' effective dates and categories are set, click the Save button to attach the documents to the record and return to the previous window or click the Save and Close button to attach the documents and close the window completely exiting Document Management. Click the Cancel button to not import any documents and return to the Documents window. Documents saved on your hard drive may also be added by the Drag and Drop method. Select the files you wish to import, drag them over to the list of documents, and drop them. Set the Effective Dates and Categories of the documents and click the Save button or the Save and Close button. Click the Cancel button to not import any documents and return to the Documents window.
To scan a new document into the Document Manager, click on the down arrow next to New Scan (v). Click on Settings. The following window will appear:
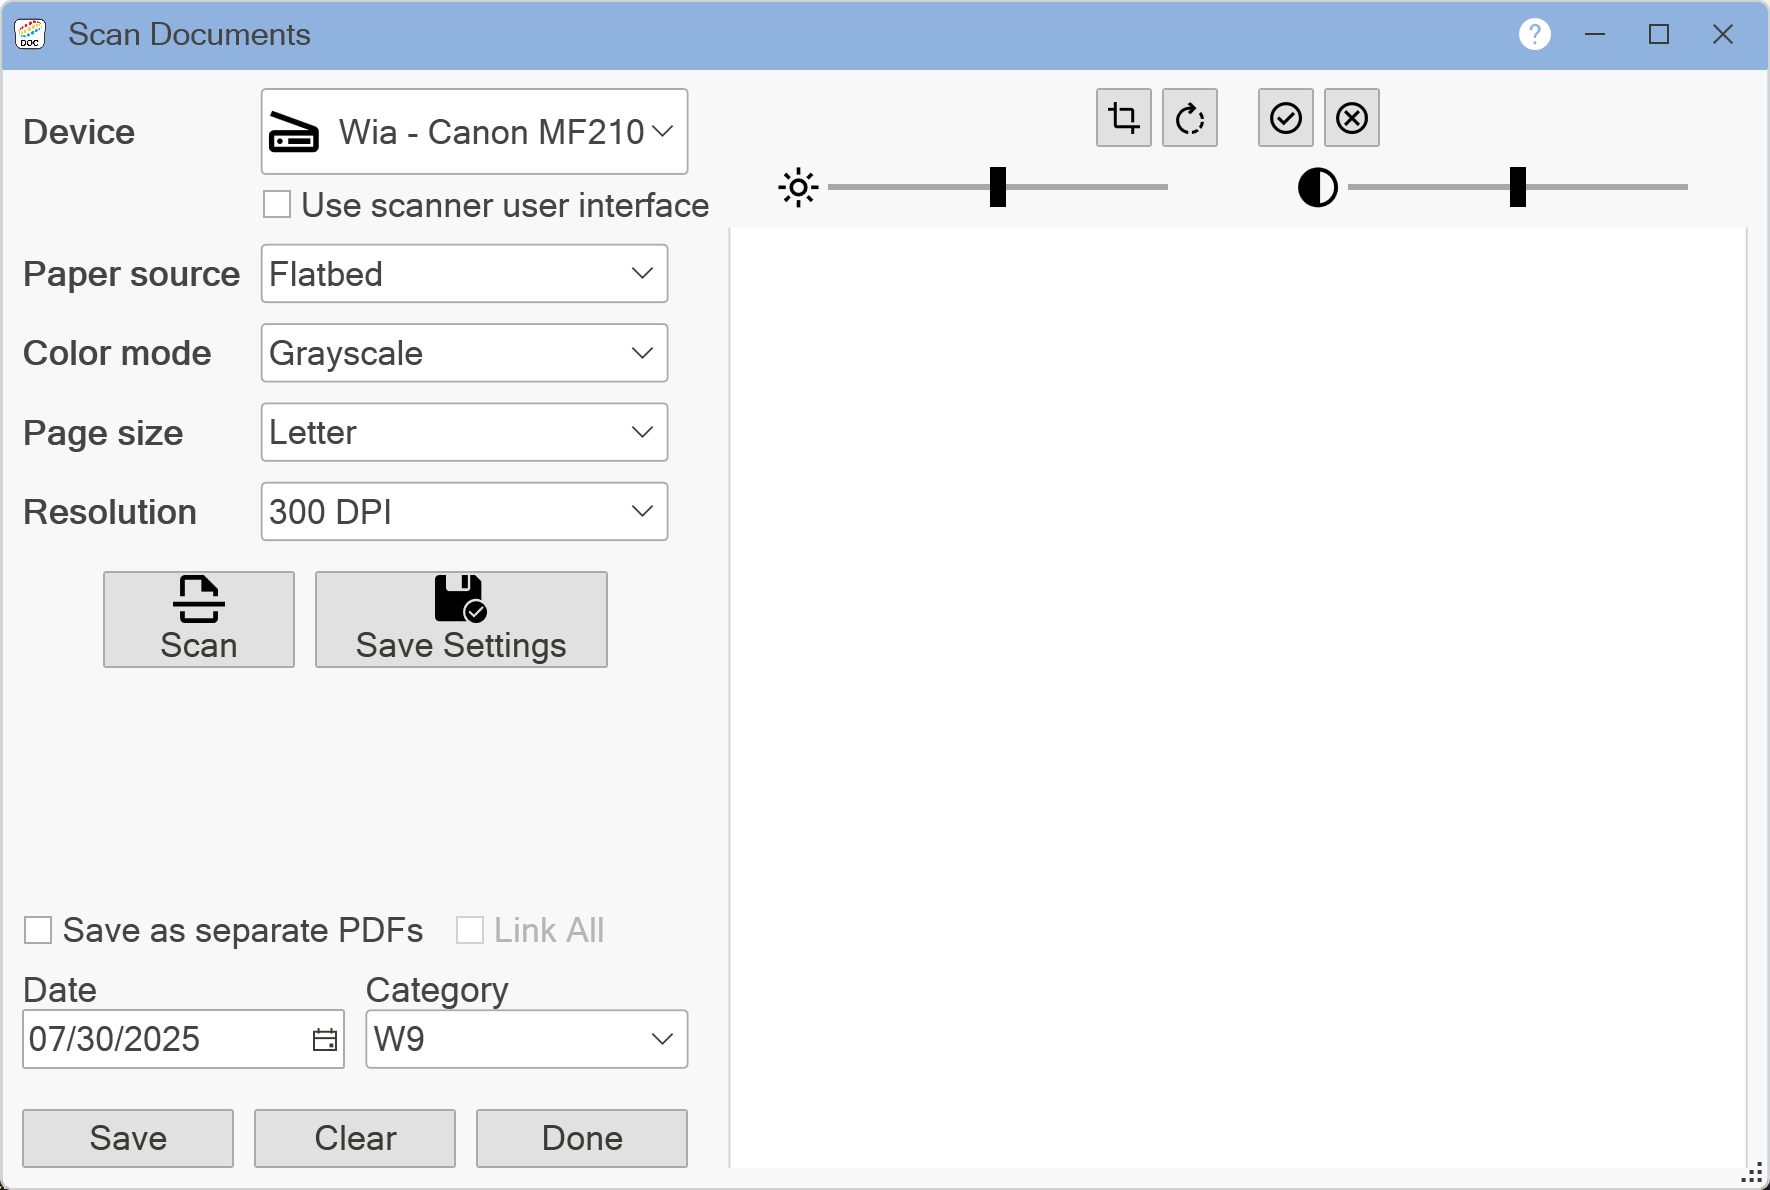
From this Scan Documents window, you may set default scanner settings, scan documents to be added to the Document Manager, and perform some basic editing to scanned documents. Select the Device you wish to use for scanning. Set the Paper Source, Color Mode, Page Size, and Resolution for the scans. If you want to use your scanner's user interface for scanning, check the Use Scanner User Interface box. Click the Save Settings button to save these scan settings as your default settings for the Document Manager. Load your documents into your selected scanner and click the Scan button. A thumbnail of each scanned image will appear in the list on the window. To view an image, click on the thumbnail of the image you want to see. It will appear in the box on the right. You may adjust the brightness and contrast of the image, rotate the image, and crop the image. Click the ![]() button to apply these changes. Click the
button to apply these changes. Click the ![]() button to revert the image back to the last saved state. Once scanning is completed and you are done editing, you may save images to the Document Manager. By default, all images made in one batch will be saved together as a single PDF document. If you have multiple images that you wish to save as individual documents, then check the Save as Separated PDFs button. Additionally, if you wish to attach all of the individual images to the record you are currently on, then check the Link All box. If this box remains unchecked, then only the first image will be attached. Set the Date and the Category (by using the drop down list) for your scans. Click the Save button to save the scans to the Document Manager. To remove all pending images from the list, click the Clear button. To remove only a single image, select the image from the list and press the Delete key on the keyboard. When you are finished scanning documents, click the Done button. You will be returned to the previous window.
button to revert the image back to the last saved state. Once scanning is completed and you are done editing, you may save images to the Document Manager. By default, all images made in one batch will be saved together as a single PDF document. If you have multiple images that you wish to save as individual documents, then check the Save as Separated PDFs button. Additionally, if you wish to attach all of the individual images to the record you are currently on, then check the Link All box. If this box remains unchecked, then only the first image will be attached. Set the Date and the Category (by using the drop down list) for your scans. Click the Save button to save the scans to the Document Manager. To remove all pending images from the list, click the Clear button. To remove only a single image, select the image from the list and press the Delete key on the keyboard. When you are finished scanning documents, click the Done button. You will be returned to the previous window.
If you have default scanner settings saved, you may scan documents directly from the Documents window. Load your scanner with your documents and click the New Scan button. When scanning is complete, a window will appear to set the Effective Date and Category of the scans. Click the Save button. You will be returned to the previous window.
To attach a document that is already in the Document Manager, click the Existing Doc button. The following window will appear:
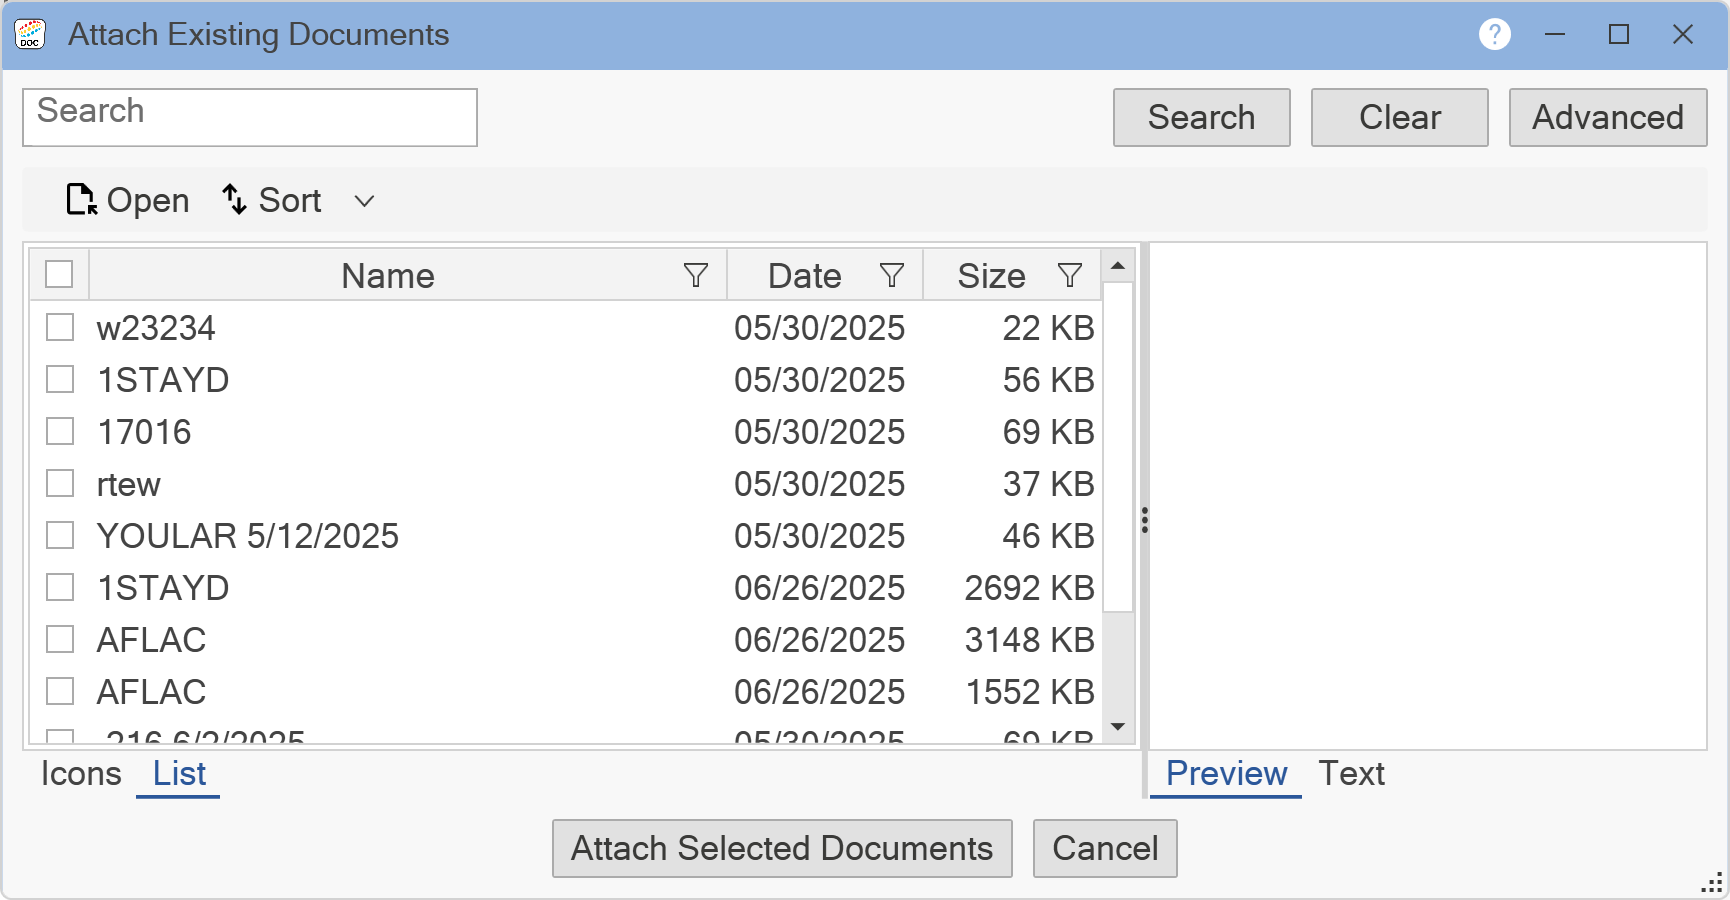
The Attach Existing Document window shows a list of all of the documents within your current module. You may filter this list further using the Search bar at the top. Enter the term you wish to search for and click the Search button. The Search will look for the entered term based on the OCR content of the document. Click Advanced to filter documents based on when and who entered the documents into the Document Manager. Select a document and use the Preview window to verify that you have the correct document. Alternatively, you can double-click the document or select the document and click Open to view the whole document. When you have selected all the documents you wish to attach, click the Attach Selected Documents button. A window will appear to set the Effective Date and Category for the documents you are adding. If a document was selected by mistake, click the X button on that line to remove it from the list to attach. When you are finished, click the Save button to return to the Documents window. If you are done working with Document Management, click the Save and Close button to attach the documents and close the window completely exiting Document Management.
Document Categories, Descriptions, and Effective Dates can be changed through the Properties window. To open a document's Properties window from the Documents window, right click on a document's icon and click Properties. Alternatively, in the list view, click the Edit ![]() button for the document you wish to edit. The following window will appear:
button for the document you wish to edit. The following window will appear:
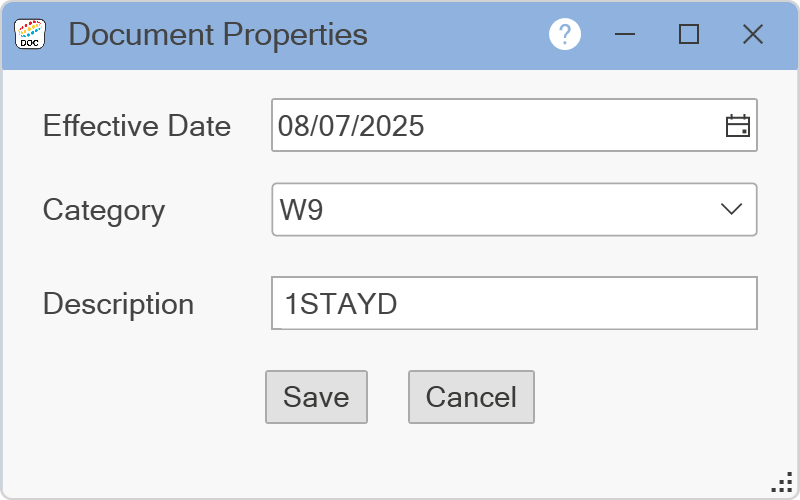
Enter your new Effective Date, select the Category for this document, and enter your new Description. Click Save. You will be returned to the Documents window.
Click on the X in the upper right corner of the window to close the window.