JOB TYPES MAINTENANCE
DESCRIPTION: The Job Types Maintenance program is used for setting up job types for job costing purposes. The Accounts Payable Post, Payroll Post, Inventory Post and General Ledger Post programs will ask you for job types if you have selected the USE JOB COSTING option in your Preferences file.
(If you do not use job costing, be sure that "Use Job Costing" is not check marked in Preferences.)
=========================================================
To start, click the GENERAL LEDGER button on the Main Screen .png) , then click the JOB TYPES MAINTENANCE button.
, then click the JOB TYPES MAINTENANCE button. .png)
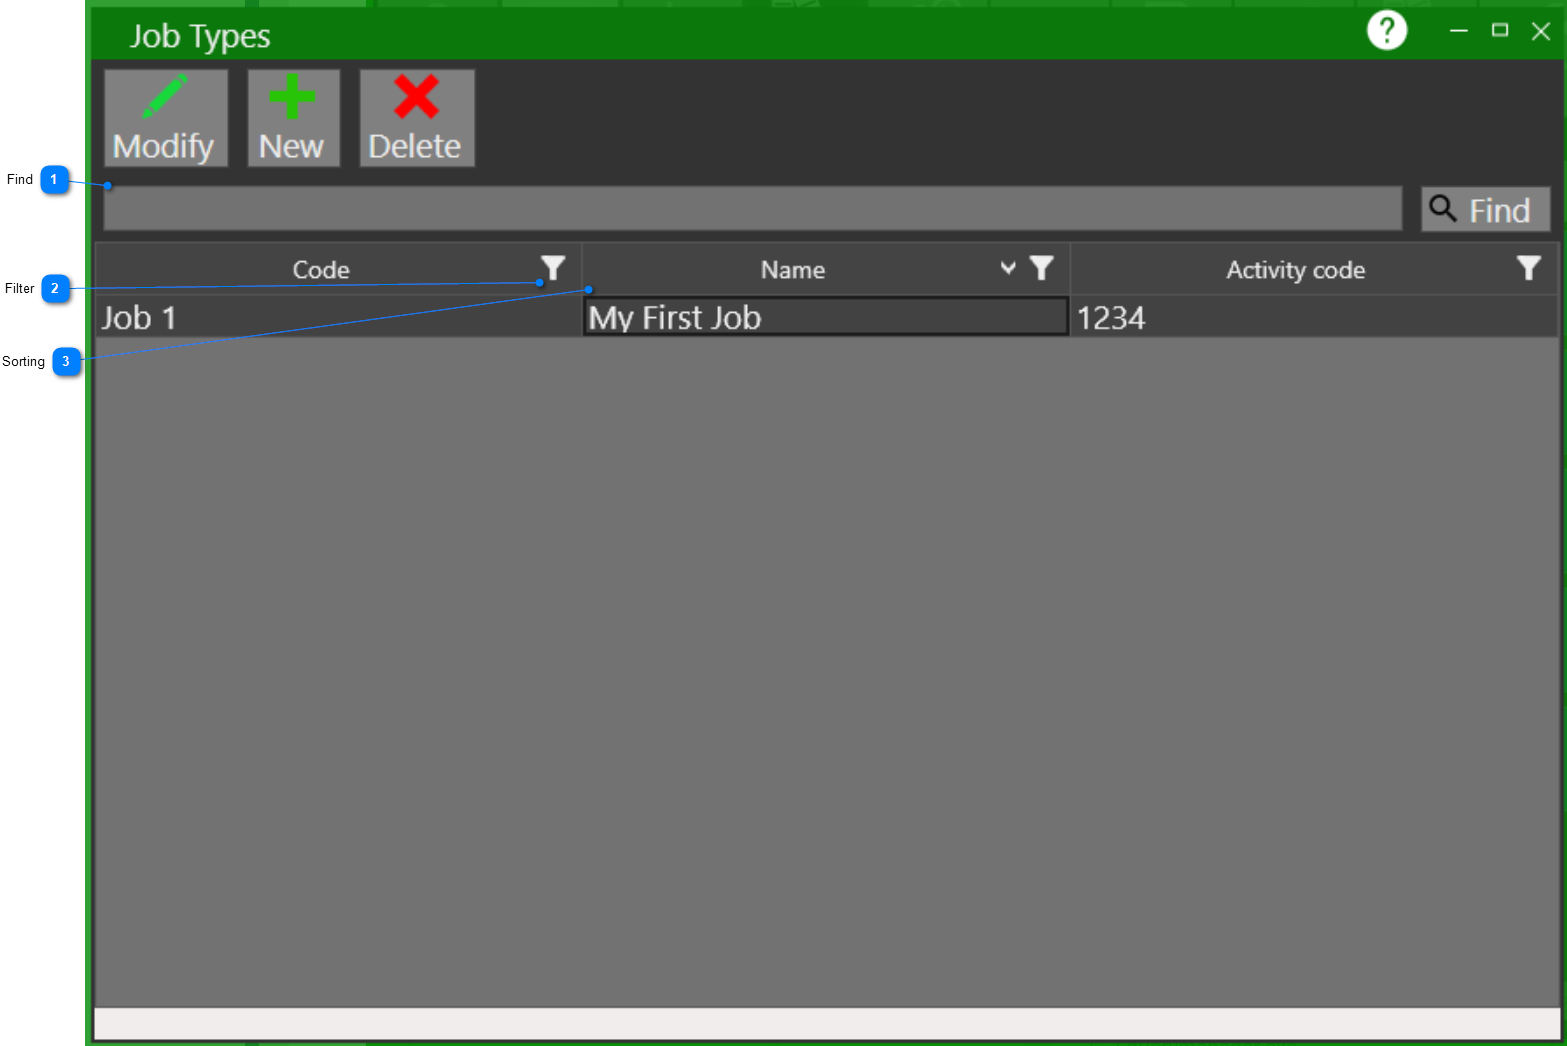
The following screen will appear:
|
Find |
|
|
The find will search the grid for any items matching anything that is entered (i.e. if you enter job the find will locate any records that have job in any of the displayed columns) |
|
|
|
|
|
Filter |
|
|
Clicking on the filter button will show you the available filtering options for a particular column |
|
|
|
|

|
Sorting |
|
|
Clicking on any of the column headers in the grid will sort the data in that column either ascending or descending |
|
|
|
|
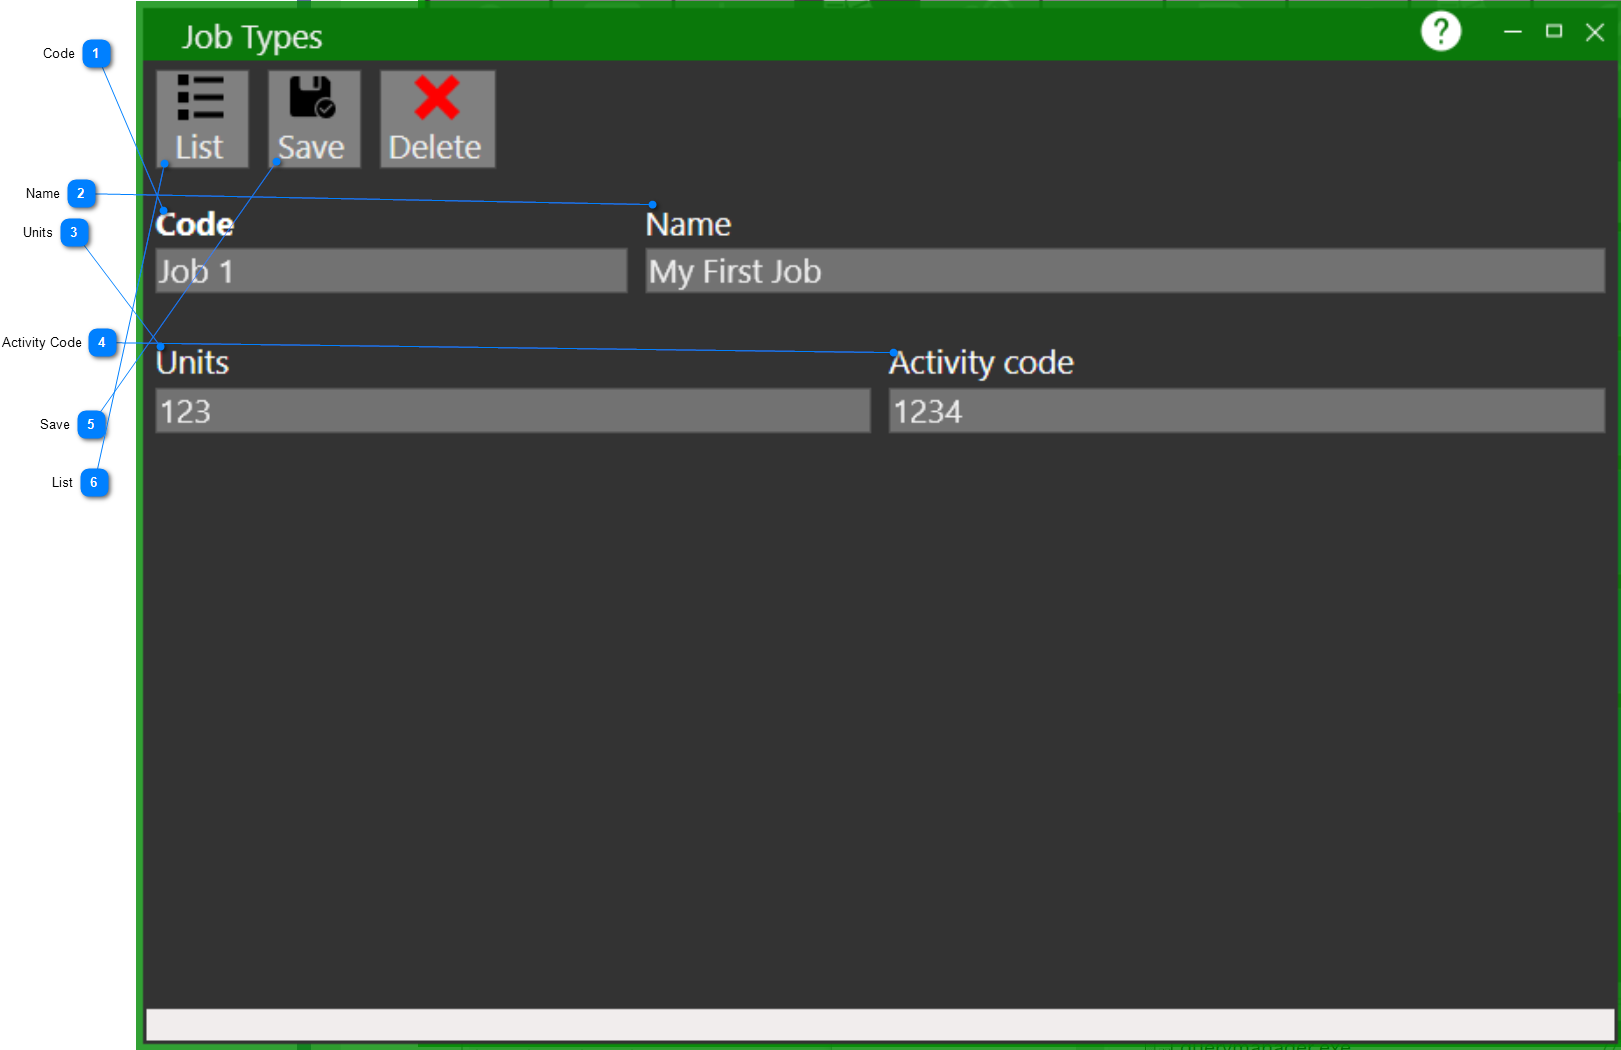
TO SET UP A JOB TYPE:


|
Activity Code |
|
|
Enter up to a 6-character activity code for this job (e.g. CON for Construction, WNTRMNT for Winter Maintenance, etc.) |
|
|
|
|


|
List |
|
|
Click on the list button to return to the list of job types. If there is a pending change made to a job type or a new job type that hasn't been saved yet, a confirmation prompt will appear asking you to save or cancel any changes. |
|
|
|
|
TO DELETE A JOB TYPE:
1.DELETE: Select the one you want to remove from the list and click the DELETE button. ![]()
If you have delete confirmations enabled then you will be asked if you are sure you would like to delete this record.
The system will not let you delete any job types that are being used.
2.CONFIRM: Click YES to confirm your delete request or click NO or CANCEL to cancel your delete request.